
How To Thrift Flip Makeovers Tools Supplies
📖 Table of Contents
- The Essentials: Tools You’ll Need to Thrift Flip Successfully
- The Power of Paint: What You Need for a Thrift Flip Makeover
- The Importance of a Work Surface: Setting Up Your Space
- Upgrading Your Thrift Flip: Additional Supplies for a Professional Look
- What to Do When You Run Out of Time or Supplies: Tips for the Unexpected
- Make It Your Way
- Frequently Asked Questions
I remember the first time I wandered through a thrift store, sifting through dusty corners and forgotten furniture, my heart racing at the thought of what I might uncover. It wasn’t just about finding something cheap—it was about discovering potential. I picked up a dented end table, its wood warped and its finish faded, and I knew with a few hours and the right tools, I could turn it into something beautiful. That’s how my journey with thrift flip makeovers began, and it’s why I want to walk you through exactly what tools and supplies you’ll need to get started.[2]
Thrift flipping isn’t just a trend—it’s a craft that blends creativity, resourcefulness, and a deep respect for secondhand finds. Over the years, I’ve learned that the right tools can make the difference between a project that feels like a disaster and one that feels like a triumph. I’ve tested everything from basic screwdrivers to high-powered orbital sanders, and I’m here to tell you what really works. You don’t need a full toolbox to get started, but you do need the essentials that will make your work easier and your results better.[3]
If you’re new to this, the idea of flipping thrift store finds might feel overwhelming. But I promise you, with the right supplies and a little patience, you can transform items that others have discarded into pieces that look like they were made for your home. I’ve spent countless hours in thrift stores, picking up everything from old chairs to cracked picture frames, and I’ve learned exactly what tools will help you bring those items back to life. Let’s get into it.[4]
Why You'll Love This Thrift Flip Makeover Toolkit
- You’ll be able to tackle projects with confidence, even if you’re just starting out.
- You’ll save money by using tools you already have or can easily afford.
- You’ll get professional results without the professional price tag.
- You’ll have the satisfaction of knowing your new furniture was once discarded and given a second life.
The Essentials: Tools You’ll Need to Thrift Flip Successfully
As of August 2026, the most important tool you’ll need is a good quality screwdriver set—preferably one with a variety of screw heads, including flathead and Phillips. I’ve found that a 6-piece set that includes both standard and deep slotted bits is perfect for most thrift finds. You’ll use this to take apart furniture and reassemble it after your upgrades.
Another essential tool is a pair of pliers. I use needle-nose pliers for reaching into tight spots, and regular pliers for gripping and bending metal parts. These come in handy when you need to remove old hardware or adjust brackets.
A small brush is also indispensable. I use a soft-bristled brush to clean off dust and grime from wood surfaces before painting or sealing. It’s a simple tool, but one that can make a big difference in the final look of your project.
Invest in a few quality tools instead of cheap ones. I’ve found that spending a little more upfront means less frustration in the long run.
Part of our Thrift flip makeovers tools supplies guide.
The Power of Paint: What You Need for a Thrift Flip Makeover
I always start with a primer. It helps the paint stick better and covers any stains or water marks that might be on the wood. I’ve used both water-based and oil-based primers, but I find that water-based ones are easier to clean up and work well with most paints.
Next, I choose a paint that’s durable and easy to apply. I’ve had great success with spray paint for quick jobs, but I also love using brush-on paint for more control. I’ve used both matte and glossy finishes, and I’ve found that glossy looks more professional, especially on furniture.
Don’t forget about the brush. A good quality brush can make your painting job look much more professional. I’ve used both flat and angled brushes, and I’ve found that angled brushes give a smoother finish on edges and corners.
Paint is the magic that transforms thrift store finds into statement pieces.
Related: Thrift flip makeovers tools supplies printable
Related: Simple thrift flip makeovers tools
Related: Thrift flip makeovers supplies tips
Related: Thrift flip makeovers tools supplies mistakes to avoid
Related: Quick thrift flip makeovers tools
Related: Best thrift flip makeovers supplies
Related: Thrift flip makeovers tools supplies that actually work
Related: Thrift flip makeovers tools step by step
Related: Easy thrift flip makeovers supplies
The Importance of a Work Surface: Setting Up Your Space
I always set up a work area in my garage or a spare room. I use a large piece of cardboard or a drop cloth to protect my floor and make cleanup easier. It’s also important to have good lighting—either natural or from a portable lamp. I’ve found that working in a well-lit area helps me see details and avoid mistakes.
I also like to have a few boxes or bins handy for sorting parts and materials. This keeps my workspace organized and helps me stay focused. I’ve had projects where I lost a screw or a piece of hardware because I didn’t have a place to put it. It made the job harder than it needed to be.
If I’m working on a larger project, I’ll use a table or a workbench. It gives me a stable surface to work on and makes it easier to move items around. I’ve used both indoor and outdoor tables, and I’ve found that an outdoor table is better for projects that might get messy or involve a lot of water.
Take the time to set up a clean, organized workspace. It’ll make your project easier and more enjoyable.
“I remember the first time I wandered through a thrift store, sifting through dusty corners and forgotten furniture, my heart racing at the thought of…”— CurbFound editors
Related: Easy thrift flip makeovers tools supplies
Related: Thrift flip makeovers tools supplies examples
Related: Thrift flip makeovers tools for small spaces
Related: Budget thrift flip makeovers supplies
Related: Thrift flip makeovers tools supplies step by step
Upgrading Your Thrift Flip: Additional Supplies for a Professional Look

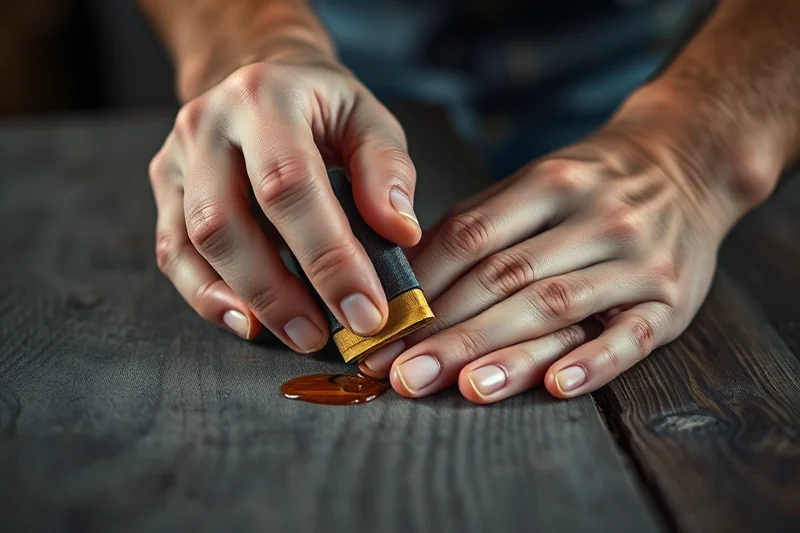
I always have a few rolls of sandpaper on hand. I use 120-grit for rough surfaces and 220-grit for smoother finishes. I’ve found that sanding before painting helps the paint stick better and gives a more even look.[1]
I also like to have some wood filler on hand. It’s useful for filling in cracks or holes before painting. I’ve used both paste and liquid fillers, but I find that paste is better for larger gaps and easier to shape.
For a more professional look, I use a clear wood sealer or wax. It helps protect the wood and gives it a nice finish. I’ve used both brush-on and spray-on sealers, and I’ve found that brush-on works better for smaller projects.
Related: Thrift flip makeovers tools supplies guide
Related: How to thrift flip makeovers supplies
Related: Diy thrift flip makeovers tools
Related: Budget thrift flip makeovers tools supplies
Related: Thrift flip makeovers tools on a budget
What to Do When You Run Out of Time or Supplies: Tips for the Unexpected
If I run out of paint, I’ll use leftover paint from previous projects or check my local hardware store for a quick fix. I’ve had projects where I needed a specific color and had to go to the store, but it was worth it to get the right shade.
If I don’t have the right tool, I’ll use something else that can do the job. I’ve used a hammer as a makeshift mallet and a spoon as a stirring tool. It’s not ideal, but it gets the job done.
If I run out of time, I’ll focus on the most important parts of the project and come back later. I’ve had projects where I had to leave something unfinished, but I’ve always managed to complete it later without any problems.
💰 Budget Build
Create a thrift flip with minimal investment by focusing on the essentials and using what you already have.
⏰ Weekend Version
Finish a complete thrift flip in a weekend with a few hours of work and the right tools.
✨ Upgraded Finish
Take your thrift flip to the next level with high-quality tools and materials for a professional look.
🏠 Small-Space Adaptation
Thrift flip in a small space with tools and supplies that are easy to store and use.
🔒 Rental-Safe Option
Use non-permanent fixes and tools that won’t damage the rental property during your thrift flip.
| The mistake | Why it happens | The fix |
|---|---|---|
| Not cleaning the surface before painting | Paint doesn’t stick well to dirty or greasy surfaces, which can lead to a poor finish. | Clean the surface thoroughly with a brush and a mild cleaner before painting. |
| Using the wrong type of paint | Using the wrong type of paint can result in a finish that peels or doesn’t look professional. | Always choose a paint that’s suitable for the surface you’re working on and use a primer if needed. |
| Skipping the sanding step | Skipping sanding can result in a rough or uneven finish, which can make your project look unfinished. | Always sand the surface before painting to create a smooth base for your paint. |
| Not securing your work area | Not securing your work area can lead to messes and make your project harder to complete. | Set up a clean, organized workspace with good lighting and a safe surface to work on. |
Related: Thrift flip makeovers supplies checklist
Related: Budget thrift flip makeovers tools
Related: Thrift flip makeovers tools ideas
Related: Easy thrift flip makeovers tools
Related: Thrift flip makeovers tools printable
How To Thrift Flip Makeovers Tools Supplies
Related: Best thrift flip makeovers tools supplies
Related: Quick thrift flip makeovers tools supplies
Related: Thrift flip makeovers tools mistakes to avoid
Related: Thrift flip makeovers tools supplies on a budget
Related: Thrift flip makeovers tools supplies for beginners
Common Questions
What tools are the most important for a thrift flip?
Do I need to buy all new tools for my first project?
What type of paint should I use for a thrift flip?
How can I make sure my project looks professional?
References
- Elise Marquardt - The American Academy of Art College (aaart.edu)
- Makeover culture: landscapes of cosmetic surgery - Academia.edu (academia.edu)
- ALVERNO - magazine (alverno.edu)
- Horizontal Networks and Social Equity in Three Cultural Districts (aura.antioch.edu)
Cite this guide
CurbFound (2026). How To Thrift Flip Makeovers Tools Supplies. https://curbfound.com/how-to-thrift-flip-makeovers-tools-supplies/
Feel free to cite or share this guide.